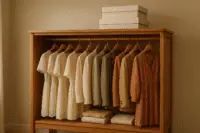
Vintage clothing sizes often don’t match modern measurements due to shifting sizing practices over decades. Here’s what you need to know:
- Sizes have changed: A size 12 from the 1950s may fit like a modern size 6 or 8 due to evolving body shapes and marketing tactics like vanity sizing.
- Standardization began in the 1940s: Mass production during WWII led to size guidelines based on body measurements, but these differed from today’s standards.
- Key measurements matter: Focus on bust, waist, and hips when buying vintage. Labels often use imperial units (inches), and ease (extra space for movement) is built into the garment size.
- Sizing systems vary: Numeric sizes were common in the 1940s-60s, alphabetic sizes appeared later, and custom measurements were used for tailored pieces.
- International differences: Sizing varies by country and era, so rely on garment measurements rather than size labels.
To shop vintage confidently, take your own measurements, compare them to garment details, and remember that labels are just a starting point.
Measurements and the History of Clothing Sizes
Common Measurement Systems in Vintage Fashion
When it comes to vintage fashion, understanding the sizing systems is key to getting the right fit. Unlike today’s standardized methods, vintage sizing reflects the eras and markets it originated from, making it a bit of a puzzle for modern shoppers. Here’s a breakdown of the main systems used in vintage clothing.
Types of Vintage Sizing Systems
Vintage garments typically fall into one of three sizing approaches: numeric, alphabetic, or custom. Each method offers unique insights into the period and style.
Numeric sizing was the standard from the 1940s through the 1960s. Women’s clothing used numbers like 12, 14, or 16, each tied to specific body measurements. For men, suits were often labeled with chest measurements in inches, such as 38, 40, or 42.
Alphabetic sizing gained traction in the 1960s and 1970s, introducing categories like Small, Medium, Large, and XL. Many vintage pieces from this time feature both numeric and alphabetic sizes on the same label, reflecting a shift toward simplified shopping.
Custom measurement systems are common in high-end or tailored vintage pieces. These garments often include precise bust, waist, and hip measurements on the labels. Designer and formal wear, regardless of the era, frequently use this approach for a better fit.
Basic Measurement Terms You Need to Know
Vintage sizing comes with its own set of terms, which have remained fairly consistent over the years. However, the way measurements are recorded and interpreted can vary.
- Bust measurement refers to the fullest part of the chest. Labels might list this as “Bust”, “Chest”, or simply “B.”
- Waist measurement focuses on the narrowest part of the torso, typically near or just above the natural waistline. Common label terms include “Waist”, “W”, or even the symbol “⌀” in older European pieces.
- Hip measurement captures the fullest part of the hips and seat area. This is typically measured 7 to 9 inches below the waist, though the exact placement depends on the garment’s style and era.
Other terms you’ll encounter include sleeve length (measured from shoulder to wrist) and back length (measured from the base of the neck to the hem). These details are especially useful for ensuring a proper fit.
Working with Imperial Measurements in Vintage Sizing
Most vintage clothing uses imperial measurements, usually in whole inches like “Bust 36” or “Waist 28.” However, high-end or custom-made pieces might include more precise measurements, such as “35½” or “36¼”, reflecting the garment’s careful construction.
It’s also important to consider ease – extra space added for movement and comfort. For example, a dress labeled with a 34-inch bust is designed to fit someone with an actual bust size of about 32 to 33 inches. The amount of ease varies by garment type: fitted styles like pencil skirts have minimal ease, while casual pieces from the 1970s often allow for several extra inches.
If you need to convert imperial measurements to metric, the math is simple: multiply inches by 2.54. For instance, a 36-inch bust equals about 91.4 centimeters, and a 26-inch waist converts to roughly 66 centimeters. These conversions can be especially helpful when working with international sizing or using conversion tools, as we’ll explore in the next section.
Vintage vs Modern Sizing Standards
Sizing standards have evolved significantly over the years, making vintage and modern clothing sizes far from interchangeable. Labels from past decades often don’t align with today’s measurements, thanks to shifts in both labeling practices and how garments are sized. Modern trends, like vanity sizing, have further widened this gap.
How Vanity Sizing Changed Modern Measurements
Vanity sizing has played a huge role in reshaping modern clothing sizes. This practice involves assigning smaller size numbers to garments than their actual measurements might indicate, catering to consumer preferences and psychology. As a result, the size on a modern label often reflects a different set of dimensions compared to its vintage equivalent. For shoppers, this means relying on actual garment measurements is key to finding the right fit.
Vintage and Modern Size Comparison Charts
Comparison charts can help visualize the differences between vintage and modern sizing, although they aren’t foolproof. Variations by brand, era, and even region make it tricky to rely solely on these guides. For women’s fashion, vintage pieces were typically designed with older measurement standards in mind, while modern clothing tends to reflect contemporary body shapes and sizing trends. Men’s clothing shows less dramatic shifts but still requires careful attention to detail.
Ultimately, the measurements of a garment are far more important than the number on the tag. Always take the time to compare your own body measurements with the actual dimensions of the clothing. Keep in mind that regional sizing differences can add another layer of complexity, especially when shopping internationally.
How to Read Vintage Size Labels
Vintage sizing rarely aligns with modern standards, so it’s essential to compare the garment’s measurements with your own to ensure a good fit.
Taking Your Body Measurements for Vintage Clothing
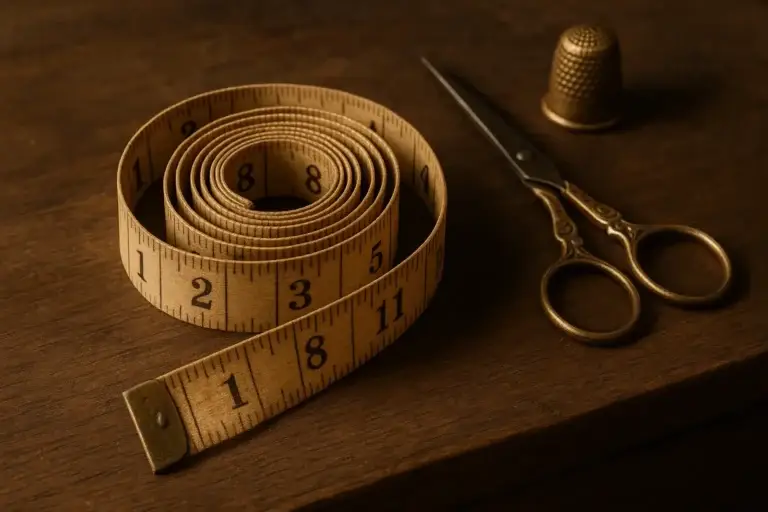
Getting accurate body measurements is the best way to shop for vintage clothing confidently. Start with three key areas: bust or chest, waist, and hips. To measure correctly, wear fitted clothes and use a flexible tape measure.
- Bust/Chest: Measure around the fullest part of your bust or chest.
- Waist: Wrap the tape around the narrowest part of your waist.
- Hips: Measure around the widest part of your hips.
For a more precise fit, you might also want to measure your shoulder width, arm length, or inseam. Always record these numbers in inches, as vintage sizing typically uses imperial units. Keep in mind that vintage garments often include extra ease, so factor that in when comparing measurements.
Once you’ve got your measurements, you can use them to interpret vintage size labels, whether they’re numeric or lettered.
Reading Numeric and Letter Size Labels
Numeric size labels on vintage clothing follow outdated systems, meaning they don’t correspond directly to modern sizes. Since sizing conventions varied across decades and manufacturers, it’s better to focus on garment dimensions rather than attempting to convert the size.
Letter sizes, like “S,” “M,” or “L,” are also inconsistent in vintage clothing. For instance, a vintage “L” might fit more like a modern medium. Treat these labels as rough guidelines and always verify the fit by checking the garment’s measurements.
Some vintage items come with combination sizing, such as “12-14” or “S/M,” indicating they were designed to fit a range of sizes. If a piece doesn’t have a label at all, rely entirely on its specific dimensions and compare them to your own measurements.
Handling Different Country Sizing Systems
Vintage sizing systems differ significantly between countries. Labels from Europe, the UK, or France often don’t align with U.S. sizing standards, and these variations can shift further depending on the era.
When buying vintage pieces from international sellers, it’s best to use the measurements they provide rather than trying to convert the original size label. Most trustworthy sellers will include precise measurements for key areas like the waist (usually measured flat and doubled), garment length, and sleeve length. These details are far more reliable than the size on the label.
Additionally, regional differences in how garments were constructed, such as waist placement, sleeve length, or overall proportions, can influence how a piece fits. This is why it’s so important to compare the garment’s measurements directly to your own before making a purchase.
Sizing Tools and Resources
When it comes to vintage clothing, getting the size right can feel like solving a puzzle. Accurate measurements are the backbone of successful vintage shopping, but the right tools can make the process much smoother. Let’s dive into how conversion charts, calculators, and other resources can simplify your search.
Size Conversion Charts and Calculators
Size conversion charts are a handy starting point for estimating how vintage sizes stack up against modern ones. They’re especially helpful when navigating international sizing differences. However, it’s important to remember that these charts are only rough guides. Vintage sizing varies greatly depending on the decade and manufacturer, so while a chart can give you a ballpark idea, you’ll still need to rely on precise measurements to ensure a proper fit.
Comparing Different Sizing Tools
Each sizing tool has its strengths and weaknesses. Conversion charts are quick and convenient but might not capture the nuances of sizing from different eras. On the other hand, taking your own measurements and comparing them directly to a seller’s listing is the most reliable way to ensure a good fit. By combining these approaches, you’ll have a better chance of navigating vintage sizing with ease and making purchases you’ll love.
Getting the Right Fit with Vintage Sizing
Navigating vintage sizing doesn’t have to be complicated. With a little know-how, you can confidently decode those older measurements and find pieces that fit beautifully.
Key Takeaways for Vintage Sizing
When it comes to vintage shopping, knowing your exact measurements is essential. Keep in mind that sizing standards have shifted significantly over the decades. For example, a size 14 from one 1960s brand might fit more like a modern size 10 or even a size 16 from another brand of the same era. There was no universal sizing system back then, so manufacturers often used their own standards, adding to the challenge.
Regional differences also play a role. A garment made in the U.S. might fit differently from one produced in Europe during the same time period. While conversion charts can offer a good starting point, they’re not always reliable. That’s why it’s crucial to rely on your measurements and understand how vintage garments were designed with ease and fit in mind.
Shopping Vintage with Confidence
Once you’ve mastered the basics of vintage sizing, the experience becomes far more enjoyable. AllVintageStyles provides detailed measurement guides and practical tips to help you along the way. Their step-by-step resources take the guesswork out of determining whether a piece will fit, making the process less daunting.
Take your time when browsing vintage collections. Carefully comparing your measurements to those of the garment ensures a better fit and helps you build a wardrobe filled with one-of-a-kind treasures. These pieces often feature exceptional craftsmanship and timeless designs that can elevate your personal style.
With a little practice, deciphering vintage size labels and matching them to your measurements will feel effortless. Use these strategies to confidently explore vintage fashion and discover unique finds that truly stand out.
FAQs
How do I measure myself to find the right size for vintage clothing?
To get the right fit when buying vintage clothing, grab a flexible measuring tape and focus on these key areas: bust, waist, hips, and shoulders. Keep the tape snug but not too tight, and always measure in inches. For the most accurate results, take your measurements while wearing well-fitting undergarments or the outfit you plan to pair with the vintage piece.
Keep in mind that vintage size labels can be quite different from today’s sizing standards. Always compare your measurements to the garment’s listed dimensions. If flat measurements are provided, double them to determine the full circumference. Knowing your measurements also helps you navigate regional sizing differences, making it easier to shop confidently for those timeless vintage styles.
Why are vintage clothing sizes so different from today’s sizes, and how can I figure out my fit?
Vintage clothing sizes can feel like a puzzle compared to today’s standards. Over the years, sizing systems have shifted dramatically, with older sizes often running smaller and reflecting different body shapes and fashion preferences of their time. On top of that, sizing varied significantly between regions and brands, making consistency a rare find.
So, how do you navigate this? Start with your actual body measurements instead of trusting vintage size labels. Grab a measuring tape and note your bust, waist, and hip measurements. Then, whenever possible, compare these numbers to size charts specific to the era or brand you’re shopping for. A good rule of thumb: vintage sizes can sometimes be 3–4 sizes smaller than what you’d wear today. Taking the time to double-check your measurements will make your vintage shopping experience much smoother.
What should I keep in mind when buying vintage clothing from international sellers to ensure it fits?
When buying vintage clothing from international sellers, it’s important to remember that sizing systems can vary greatly depending on the region and era. Vintage size labels are often inconsistent or misleading, so relying on exact measurements is much more reliable than trusting the listed size.
Grab a flexible tape measure and note your key measurements, specifically your bust, waist, and hips. Compare these to the dimensions provided by the seller, ensuring they’re listed in inches, as vintage pieces often use imperial units. If the seller’s listing lacks detailed measurements, don’t hesitate to reach out and ask for more specifics – better to clarify now than deal with a poor fit later.
Also, keep in mind that vintage sizing can be affected by regional standards or vanity sizing trends from the past. Open and clear communication with the seller can go a long way in making sure your new vintage find fits like a dream!